3D scanning is a complicated task. Learning how to use a 3D scanner takes time and no one can become an expert overnight. Here are the basic steps to scan a real life object into a 3D model and tips to get optimal results.
Step 1: Have a Stable 3D Scanning Environment
As discussed in a previous blog post, 3D Scanning in Everyday Environments, make sure the 3D scanner is set up in a stable environment. Minimizing environmental disruptions will ensure that your 3D scan results are not affected by external factors within your control.
Step 2: Calibrating the 3D Scanner
Some manufacturers pre-calibrate their 3D scanners while others require the user to calibrate the system themselves. Calibration is important because the 3D scanner needs to know its environmental conditions to generate proper 3D scans. During the calibration process, the scanner figures out the position, rotation and behaviour of the 3D scanning equipment (ie. cameras/projectors) in relation to the scan object.
When calibrating the scanner, the equipment settings should be adjusted to the conditions of the 3D scanning environment. Correct camera setup is a big influencer between a good scan or bad scan. Make sure the exposure settings are good and the focus is correct. Follow the manufacturer’s instructions for calibration very carefully as poor calibration produces inaccurate 3D data. If your source data is not good, there’s no software or technology that can fix it afterwards.
After calibration, check the accuracy of the 3D scanner by scanning an object of known measurement. If you find that you are not getting the level of accuracy the scanner is able to achieve, you need to re-calibrate the scanner.
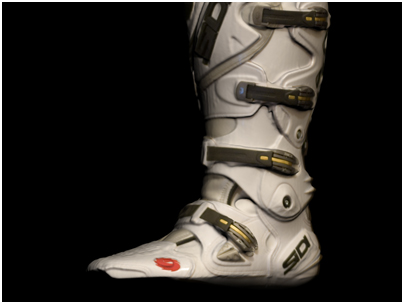
Step 3: Prepare the Scan Object
Some surfaces are difficult to scan. These include translucent materials (glass), shiny, or dark objects. If the part can be painted, use a matte white spray paint to cover the object. Paint only in very light coats. Spraying too much will cause dripping and it will show up in the scans. For non-permanent coverage, use tinactin powder spray or a foot powder spray to provide a light coat that will generally not damage the object.
Step 4: Scan the Object
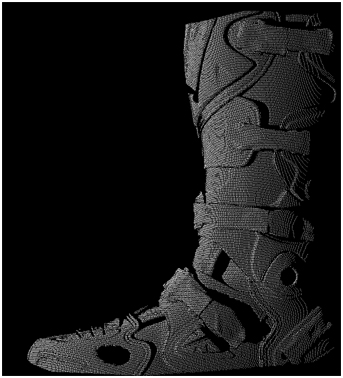
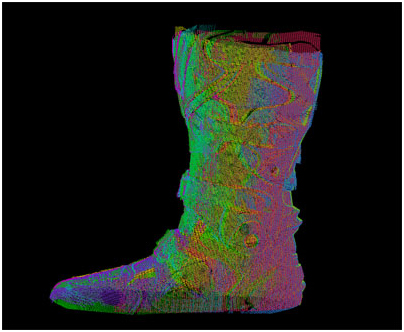
If you are looking to do a complete 3D model of an object, capture single 3D scans of the object from different angles and align and merge them later during post-processing. Each scan need common features for alignment so make there is enough coverage. The output of each scan will be a point cloud.
Step 5: Point Cloud Cleanup
It’s rare to get a 3D scan with no defects. Point clouds should be brought into a scan processing program for post-processing. Any outlying points and noises should be deleted or smoothed over.
Step 6: Alignment, Merging and Mesh Cleanup
You will need to register or align the scans together to form a complete 3D model.
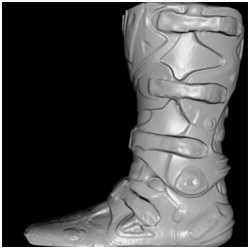
Once all the scan segments are aligned, merge the scans and triangulate them in to the final mesh.
At this stage, generally the mesh may have holes, bumps or simply excess data that you don’t want. You can clean them up using tools in the scan processing software. Coming in with clean scan data will make this step nice and quick. If the data is too noisy it is often better to rescan the data with better settings.
Step 7: Scan Texturing (Optional)
Depending whether your 3D scanner has this functionality, you can add texture onto the final mesh.
Step 8: Scan Data Conversion
For most projects, 3D scanning is the first part of the project. Scan data is ultimately used for other purposes, whether it is CNC to mill out an object, for visualization or inspection. The downstream data path is different for various applications. Using scan processing software, you can convert the high polygon mesh surface to other formats for use in industry standard applications such as low polygon representation (OBJ), NURBS or a solid model (STL).